Go Back
A selection of homemade chocolate cups are displayed on a table. Some are in a white box filled with decorative paper shreds, while others are arranged on a small wooden cutting board and plates. Chocolate chips are scattered around as decoration.

Homemade Reeses Peanut Butter Cups

This homemade Reese’s Peanut Butter Cups recipe will satisfy your peanut butter cravings in just minutes, and they taste just like the real thing!
Prep Time 15 minutes
Cook Time 0 minutes
Refrigerate Time 30 minutes
Total Time 45 minutes
Servings: 18
Course: candy
Cuisine: American

Ingredients
  

  • ¾ cup crushed graham crackers
  • cup powdered sugar
  • 9 ounces peanut butter (creamy or crunchy)
  • 10 tablespoons butter, divided
  • 12 ounces semi-sweet chocolate chips

Method
 

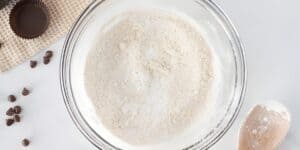
  1. Step 1: In a medium-sized bowl, combine graham cracker crumbs and powdered sugar until well blended. Set aside.
    A clear glass mixing bowl filled with flour mixture is placed on a white countertop. To the left are chocolate chips, a chocolate cup, and a cloth. A wooden spoon with flour rests on the right side near the bowl.
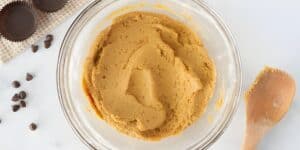
  2. Step 2: In a microwave-safe dish, combine peanut butter and 6 tablespoons butter. Cook in the microwave in 15-second increments, stirring in between, until melted and combined. Pour over the graham crackers mixture. Continue to stir until well combined. Set aside.
    A glass bowl with creamy peanut butter mixture on a white countertop, alongside a few scattered chocolate chips, a wooden spoon with some mixture on it, and a partially visible muffin tray lined with paper cups containing chocolate.
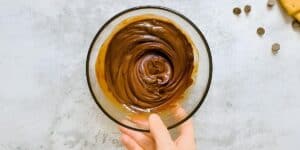
  3. Step 3: In a microwave-safe dish, combine half of the chocolate chips (6 ounces) with 2 tablespoons of butter. Cook in the microwave in 15-second increments, stirring in between, until melted and combined. Set aside.
    A hand holding a glass bowl filled with smooth, swirled chocolate ganache. The bowl is set on a light gray textured surface with scattered chocolate chips and a partial view of baked goods in the top right corner.
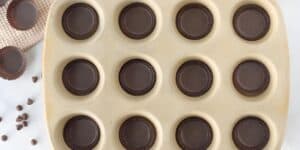
  4. Step 4: Place cupcake liners in a cupcake tin.
    A beige muffin tray with twelve cups, each holding a chocolate peanut butter cup. To the side, additional chocolate peanut butter cups and scattered chocolate chips are visible on a white surface.
  5. Step 5: Using a paintbrush or pastry brush, paint each cupcake liner with melted chocolate. If using full-size cupcake liners, paint about one-third of the way up each cup. If using mini cupcake liners, paint halfway up each cup. Be sure to evenly coat the bottom and sides. You don't need to paint the chocolate super thick, just enough so you don't see any of the liner underneath. Place in the refrigerator to cool for about 5 minutes, or until chocolate hardens.
    A hand is holding a chocolate cup filled with smooth melted chocolate. In the background, there is a glass bowl containing more melted chocolate with a light blue spatula resting inside it. The setting appears to be a kitchen or baking area.
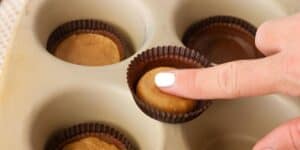
  6. Step 6: Press about 1 tablespoon graham cracker mixture in each full-size cup (about 1 teaspoon for mini cups), making sure the top is somewhat flat. It doesn't need to be perfect; just make sure you don't go above where you painted the chocolate on the cup. Set aside.
    A hand with white-painted nails pressing down on a peanut butter cup in a cupcake liner inside a muffin tray. Other peanut butter cups in liners are visible in the tray.
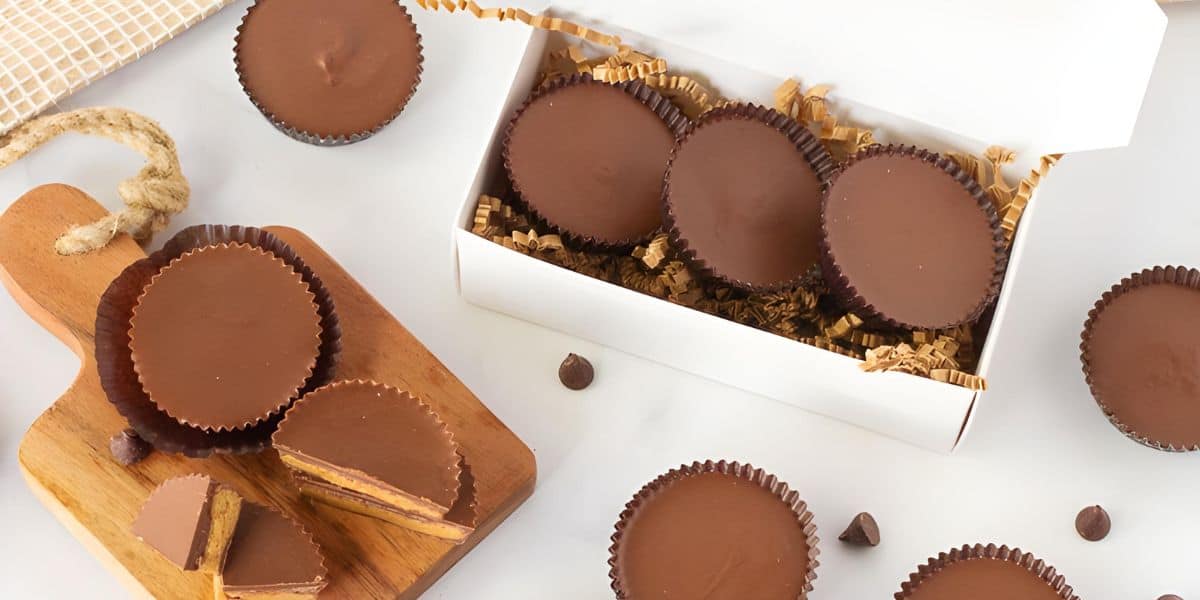
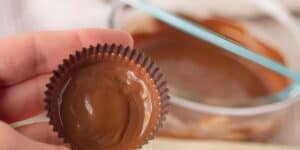
  7. Step 7: Add the remaining chocolate chips to the remaining melted chocolate in the microwave-safe dish. Melt with remaining 2 tablespoons butter, stirring every 15 seconds.
    Spoon a little chocolate over each peanut butter cup until the peanut butter filling is completely covered. You can lightly shake or tap the cupcake pan to even out the chocolate over the filling. You want the top of the peanut butter cups to look completely flat.
    A spoon pours melted chocolate over a peanut butter cup that sits in a muffin tin. Another partially filled peanut butter cup is visible in the background, with a cloth in a checkered pattern behind the tin.
  8. Step 8: Place in the refrigerator or cool area until chocolate hardens, about 20 minutes, or until the chocolate is no longer shiny, then serve!
    Assorted chocolate peanut butter cups are displayed on a wooden board and surrounding surface. Some cups are cut in halves, revealing the peanut butter filling. Two chocolate kisses are also present among the treats.

Notes

  • The paintbrush I like to use is a roughly half-inch-wide flat brush.
  • The amount of chocolate needed tends to vary each time, so keep a few extra chocolate chips on hand in case you need a bit more.